
I’ve talked about this at length over the years about my “if you give a mouse a cookie” situation with Ryan. If you give Ryan a house project, he’s going to want to do more projects before you can accomplish the one initial project.

Back in 2013, we moved into a 1950s, Mid-Century Modern home. It needed a lot of love and attention… but as newly weds in our mid 20’s we knew we had all the time and energy to get it done. I adored this little 1800 sq ft bi-level. I saw all the potential, loved its unique exterior, and wanted desperately to have the outside personality match the inside. (Even if the previous owner, decided it should be “tuscan villa inspired”.)
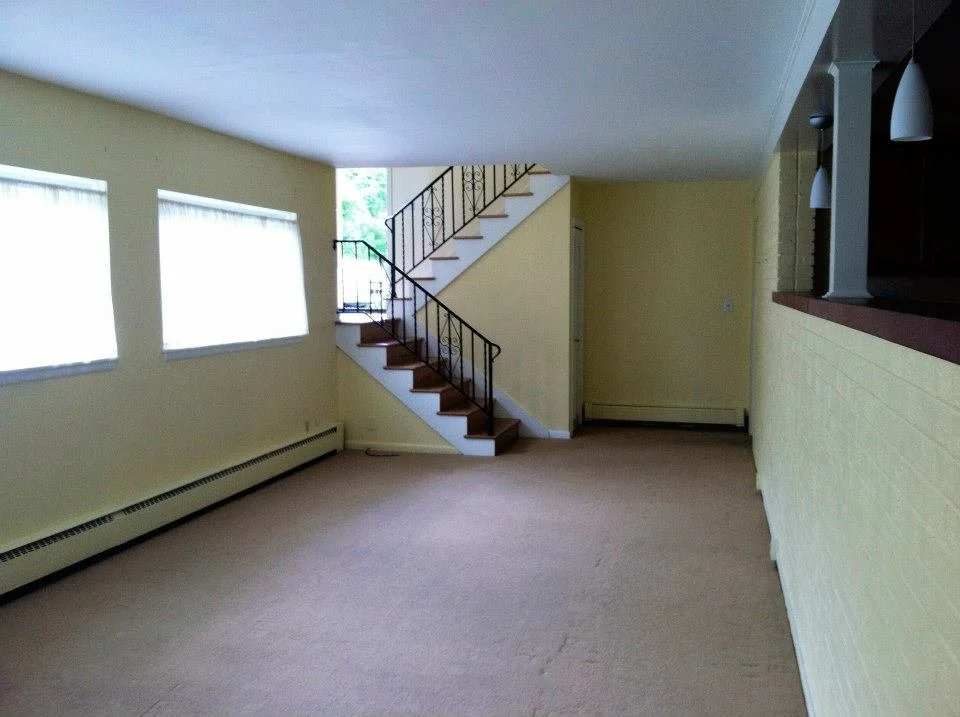
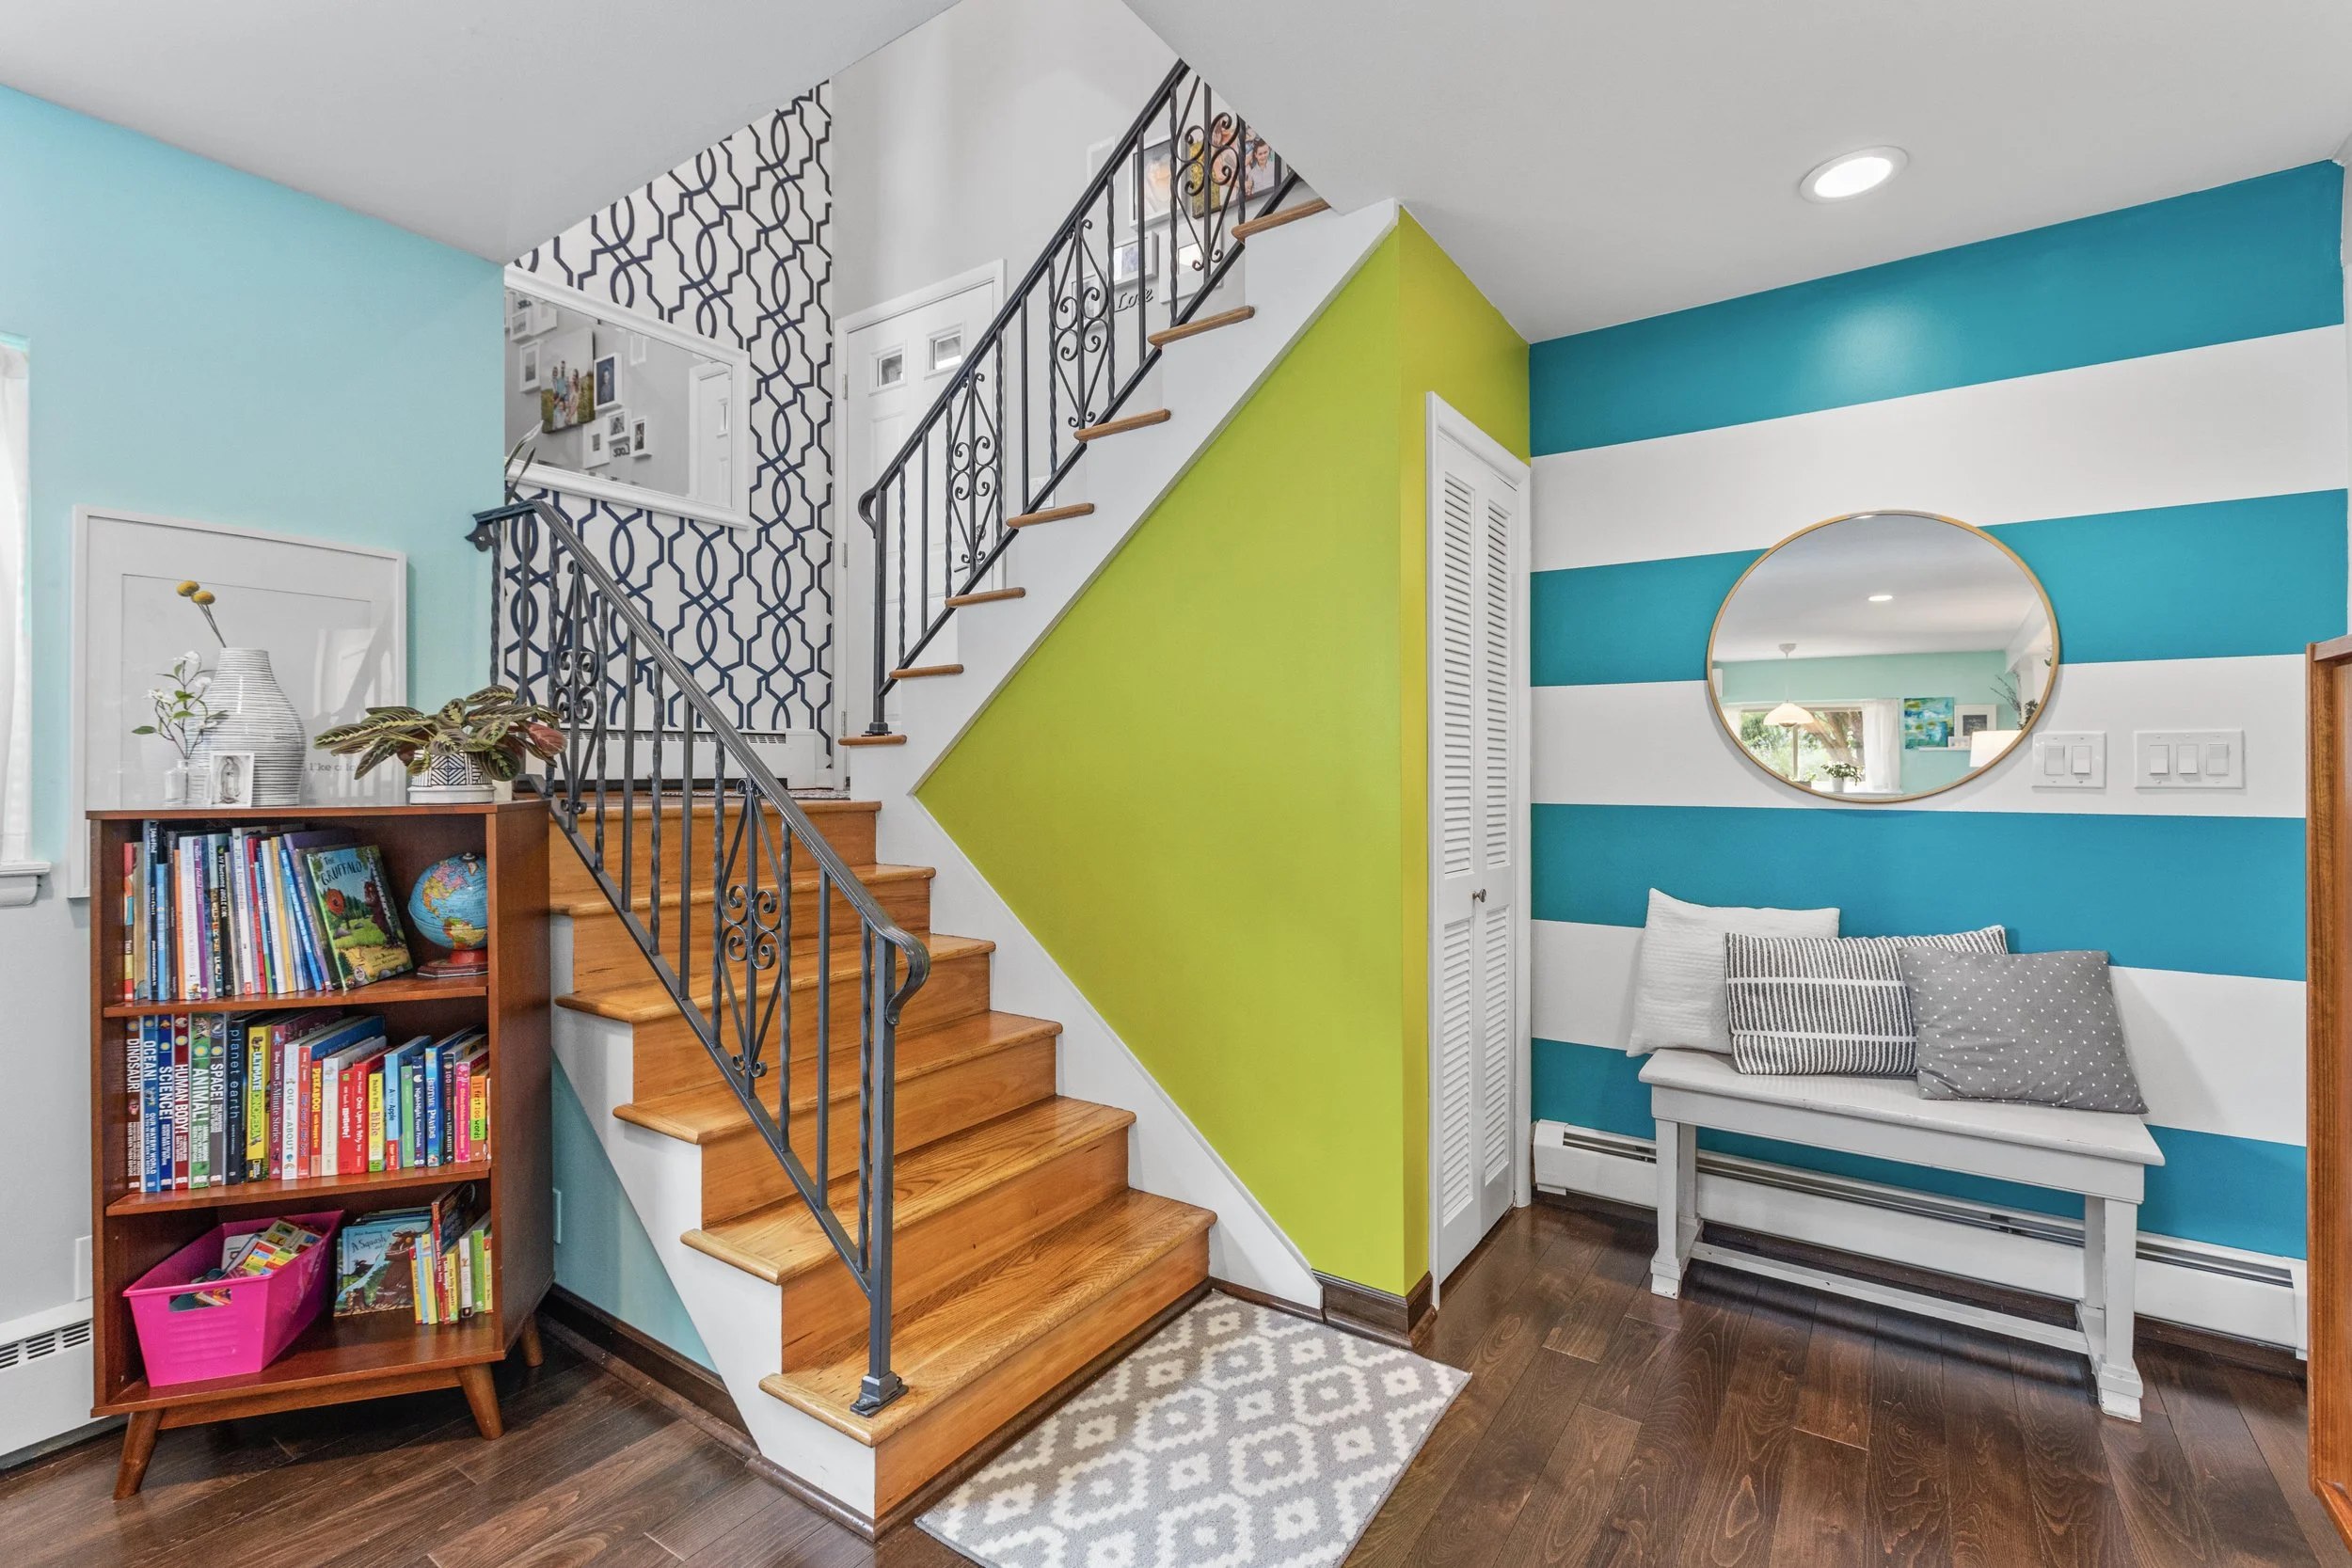
We took the keys in June, in the thick of Wedding season. Right away we got to work making my home office what we wanted. Ikea Cabinets, tantalizing teal walls, new lighting. As a Wedding photographer, I needed a nice, happy space to spend the majority of my days as I edited thousands of photos. By August, I was begging him to let me paint the living room. I had enough of the butter yellow walls… Something needed to change. “I just want to paint the Living room,” I told him, holding back tears. “Please, it’s killing my soul after living in apartments with white walls for the past 3 years… I need color.”
He stared at me for a few minutes, watching him process through all the things that need to be done before he gave me the green light to start painting.
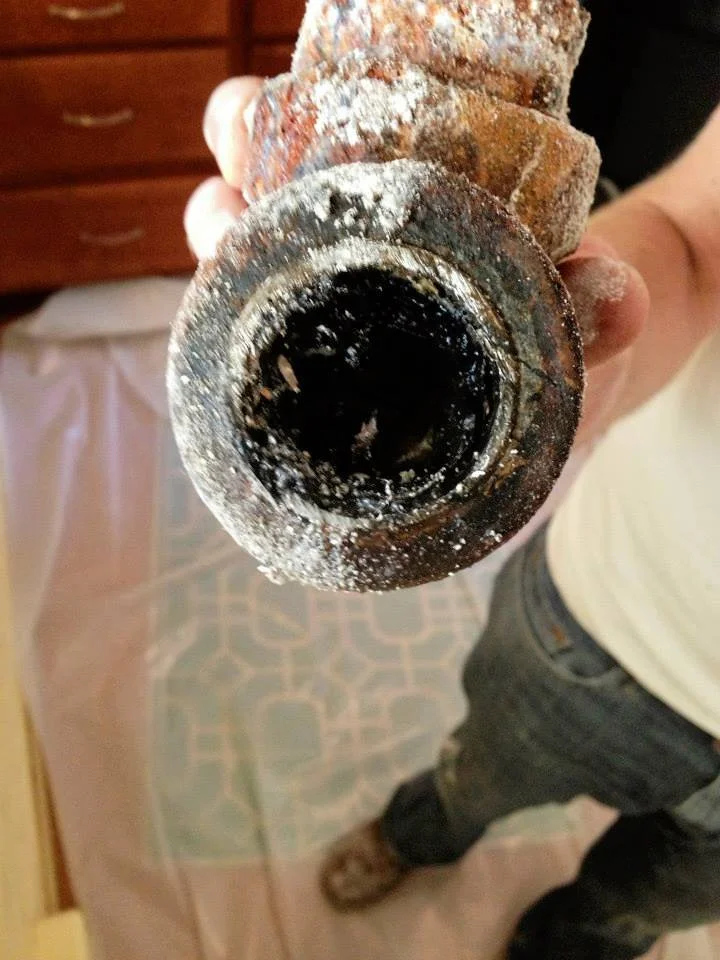
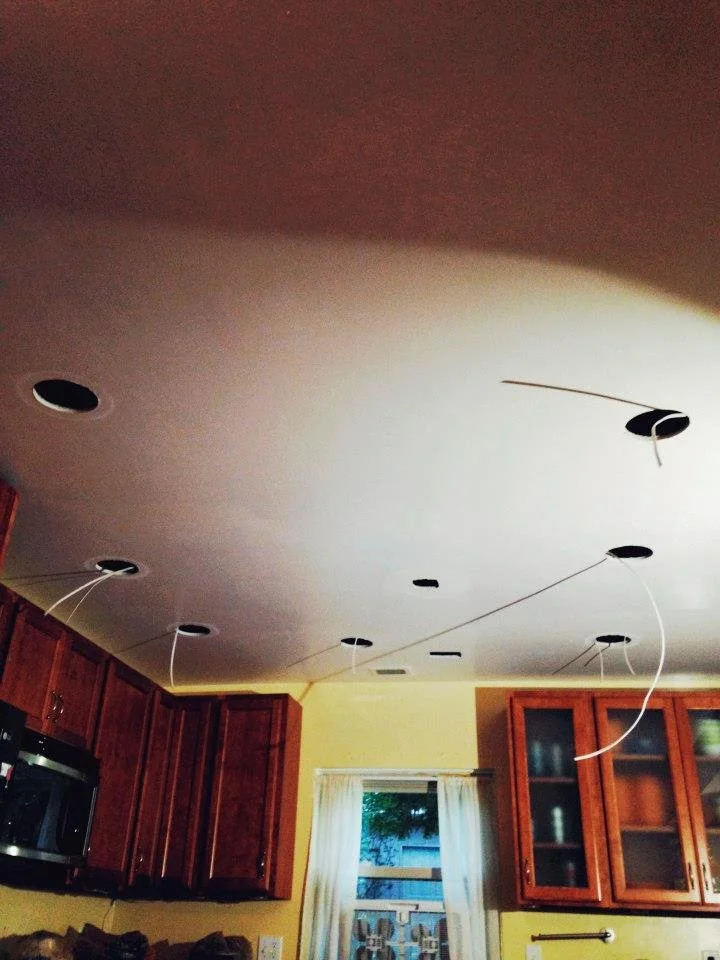
“If we’re going to paint the walls, we should paint the ceiling first. If we are going to paint the ceiling, we should add the recessed lighting we want first, so we will need to cut a long strip across the ceiling in order to run the wiring. While we have the ceiling open, we should also run the lighting into the kitchen too. If we are going to do the lighting in the kitchen, we should fix the drain in the upstairs bathroom, while the ceiling is open. And If we are going to have all this stuff ripped up, we might as well rip up the carpet and change the flooring to hardwood like we wanted.”
Trusting the man I married, I said okay… Let’s do it. His brain works very different than mine, so I trusted that he knew what would be best. (Spoiler alert: he did, and usually does)

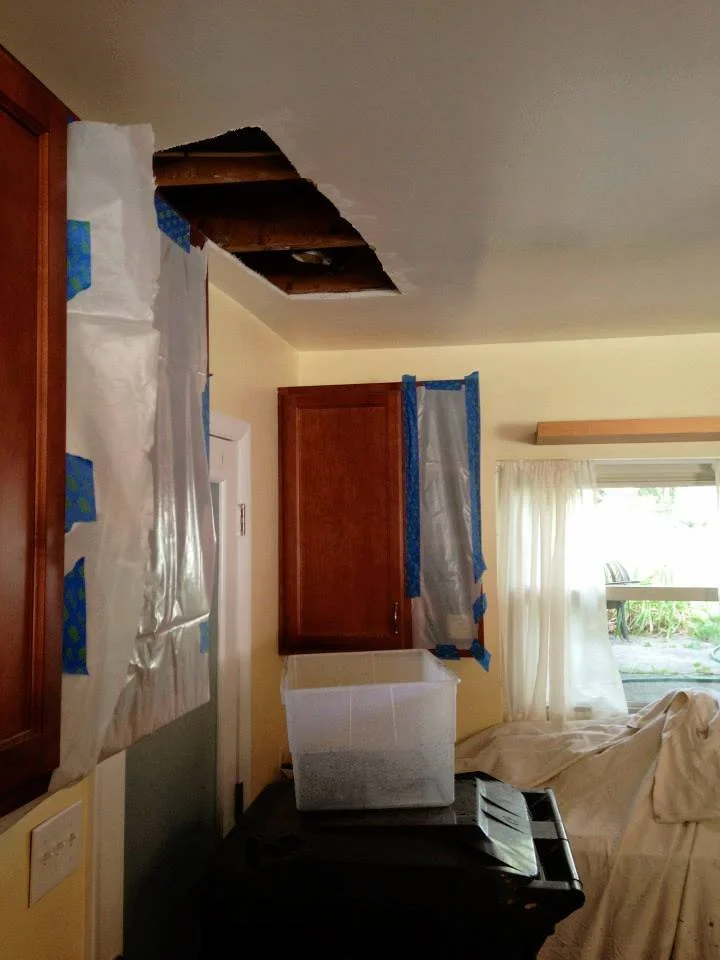
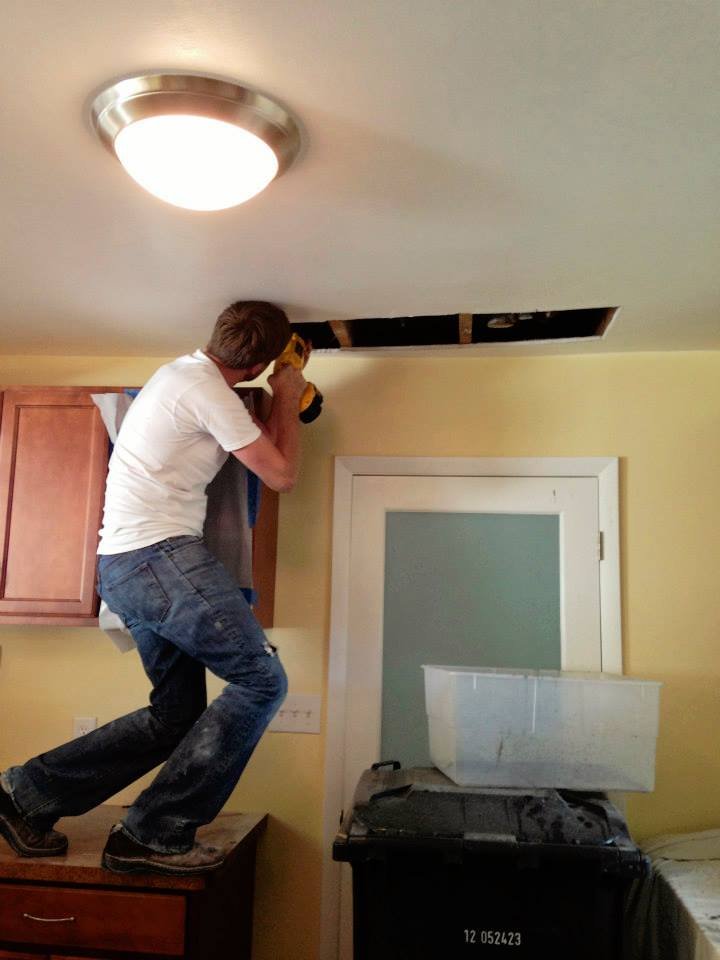
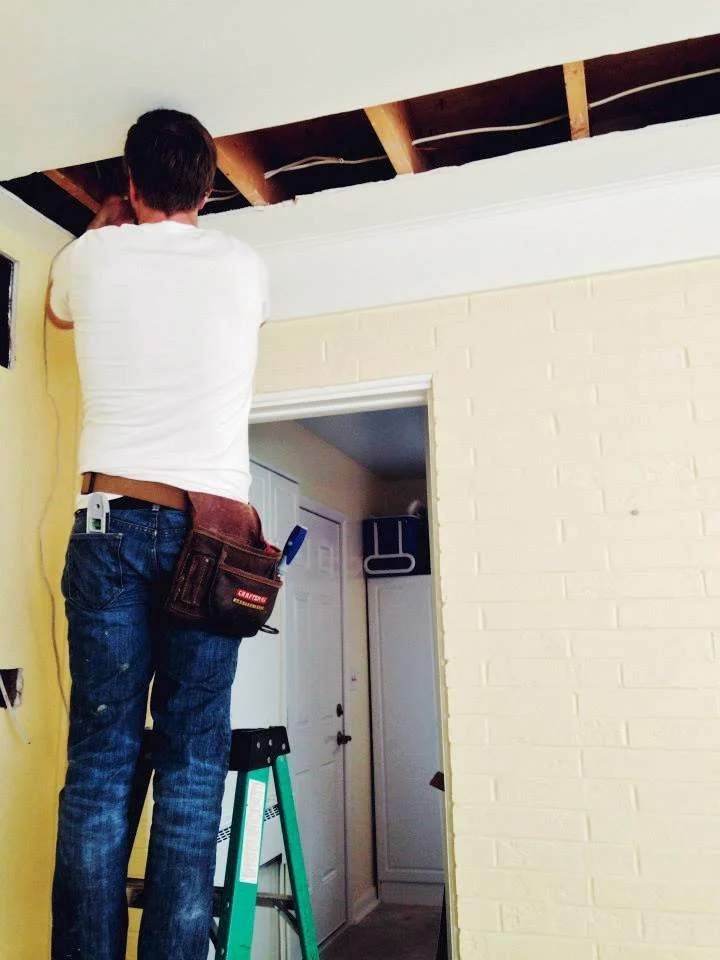
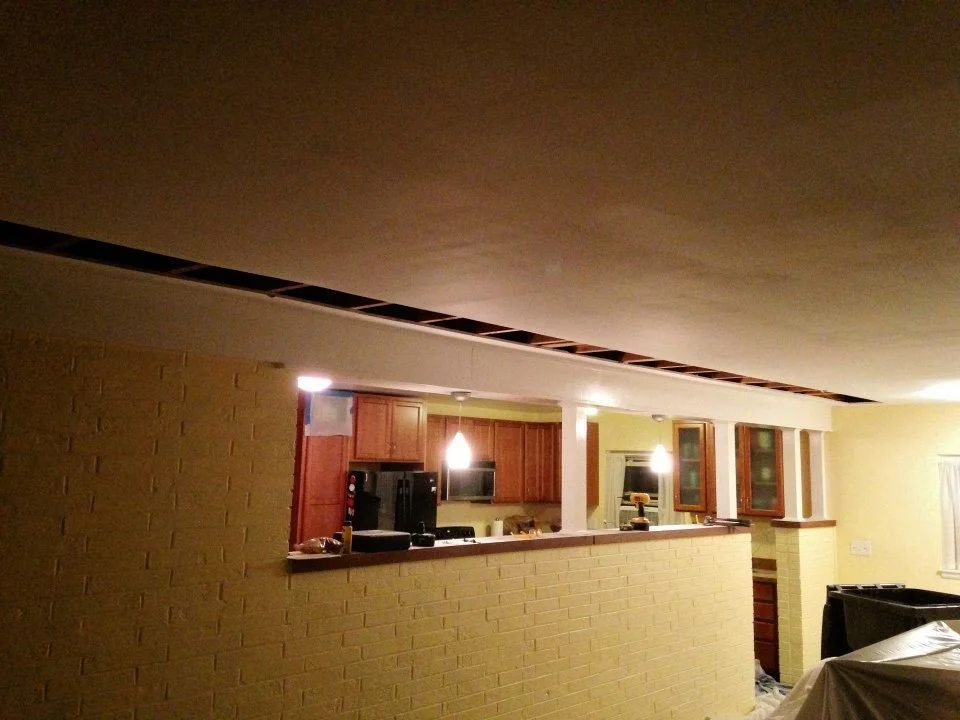
So on our first wedding anniversary, that’s what we did. We started by cutting a massive hole in our ceiling. In between photographing weddings, Ryan doing 3 home inspections per day, and the many trips to Traverse City… we tried to do the work necessary to make our vision a reality. While also not making ourselves broke in the process. Materials cost money, flooring is expensive, and new furniture to match our “mid-mod vibe” wasn’t cheap.
Doubt started to creep in, and somewhere around that time, we sold our old couch and other furniture while we paid cash for our new pieces and waited for their delivery.
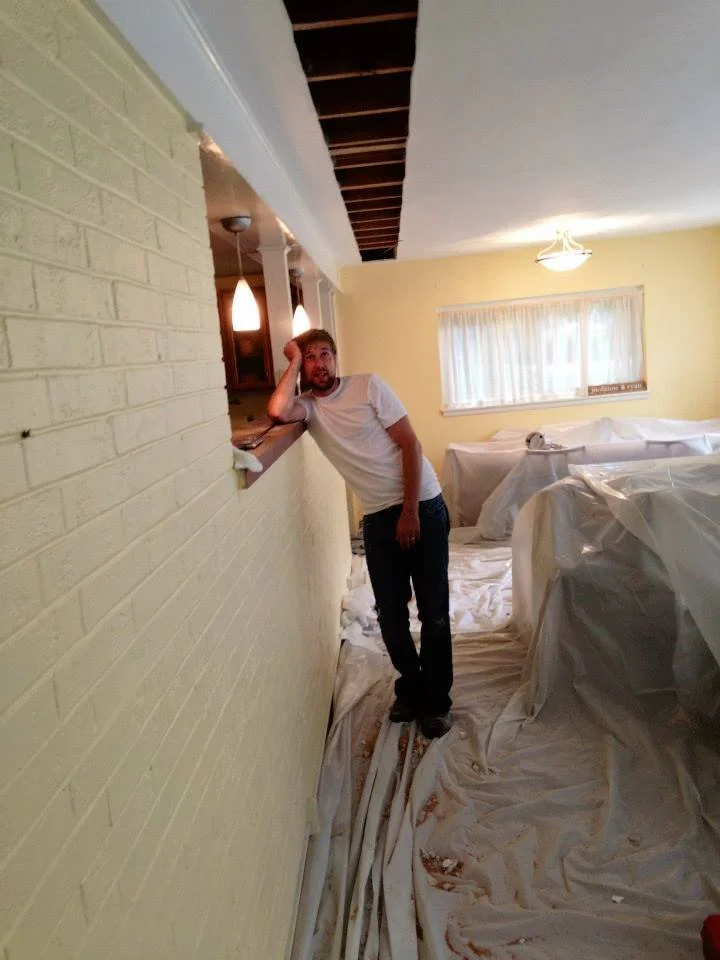
We cut the hole. We fixed the drain. We added the lighting in the kitchen. We covered everything in plastic, making our house look like a Dexter Kill room. We ordered take out, grilled our dinners outside, always wore shoes in the house, as it was ripped up like this for MONTHS.
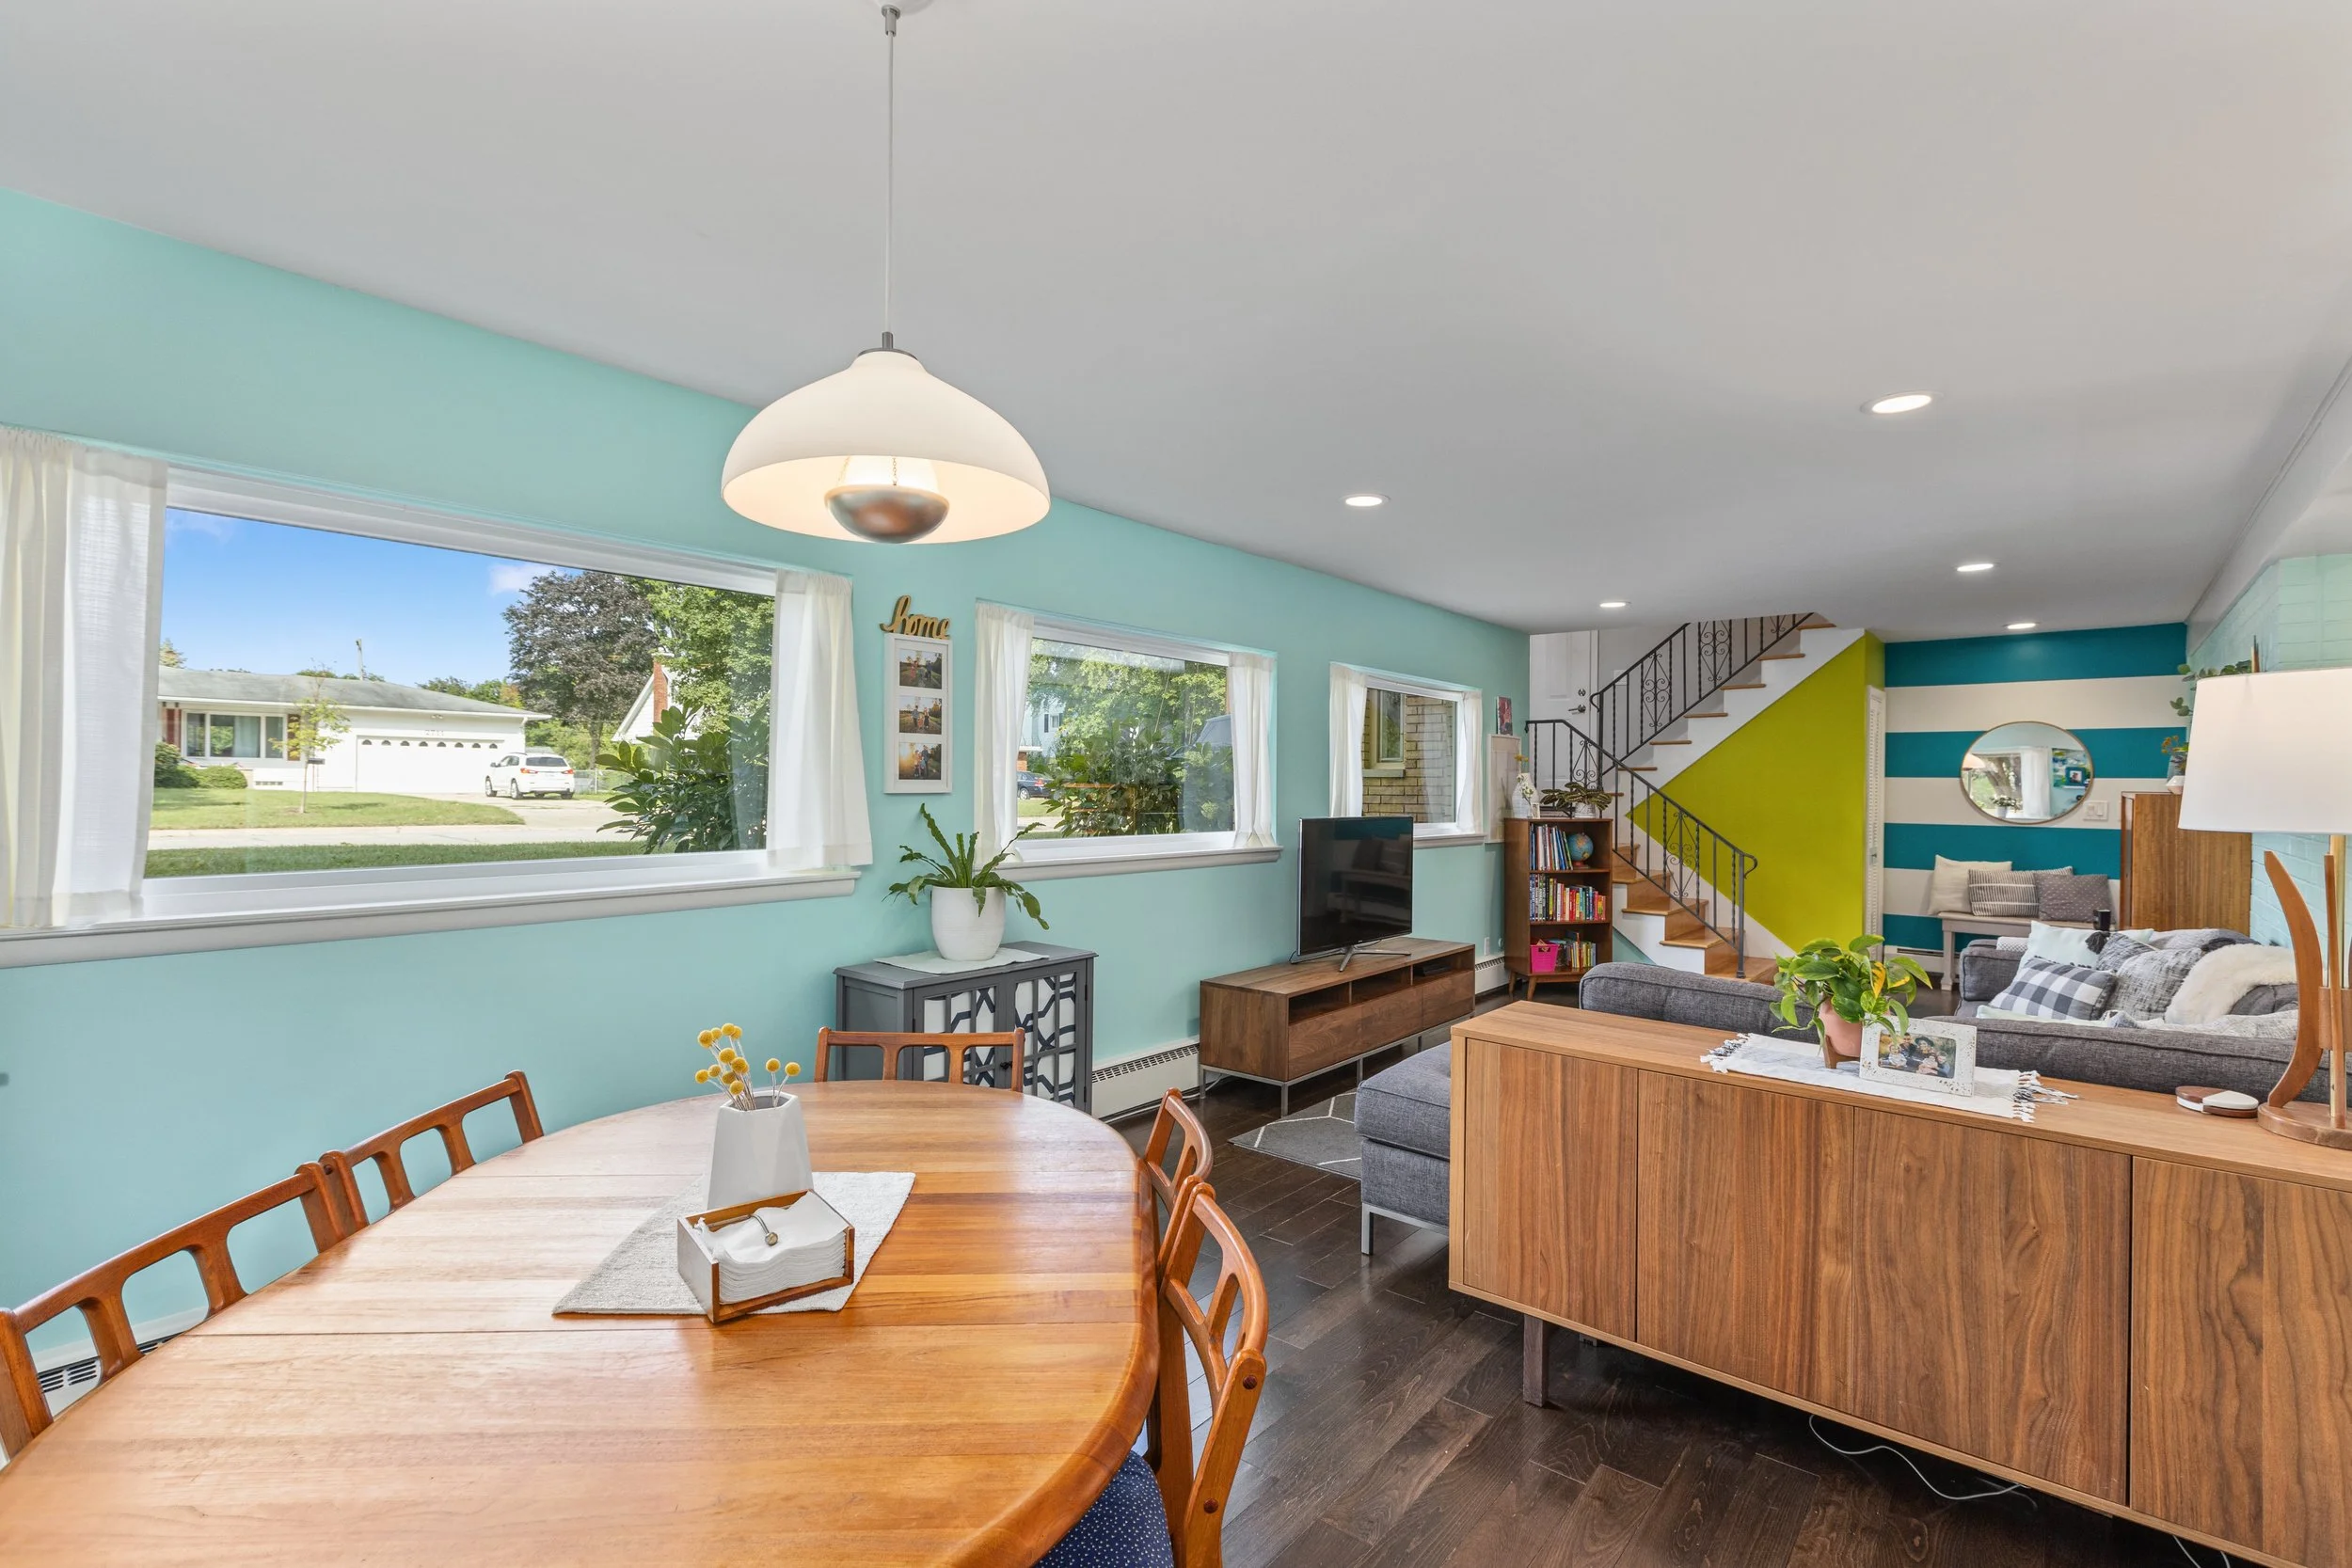
Somewhere around November, we discovered I was pregnant. That lit a fire for sure, especially because I was so sick those first few months of pregnancy, I was ZERO HELP. We starting paying my youngest brother to come over and help with the work, in order to expedite the process. Almost 4 months to the date, the Aquatint, by Sherwin Williams wall paint I had picked out for the living room finally went on the walls. While we waited for our new couch to be delivered, a queen size air mattress was how we watched TV in our living room.

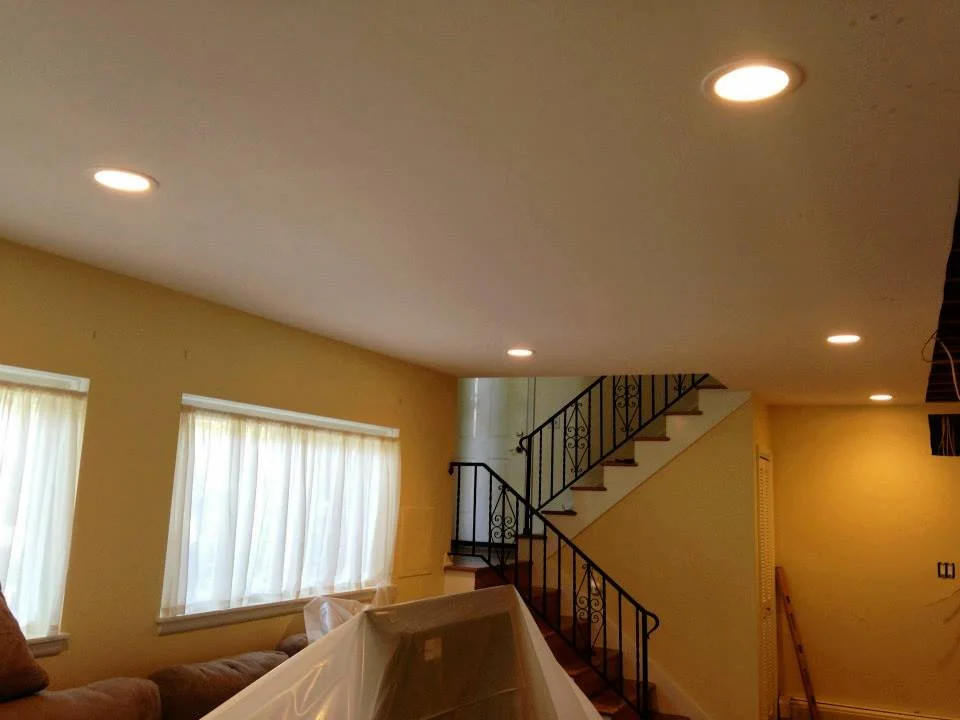
By Christmas, we were feeling a little more normal, and could see the light at the end of the tunnel, at least at the end of the living/kitchen lighting and painting renovation tunnel. The custom couch we had picked out from a local furniture store and the Crate & Barrel entertainment center & coffee table had all been delivered. The lights were all in, the hole in the ceiling was closed up, the ceiling was painted, the drain in our upstairs shower was finally draining better. We felt like we could rest for a second, before we had to start the next project… A baby Nursery!
This was our FIRST big house renovation as a married couple. It tried us in many ways, but in the end, I learned to trust my husband and his beautiful mind. Where I see all the bright colors and fun decor choices, he sees the logistics and all the work that goes into that. Even if the process makes us both crazy, we are both so appreciative of each other and how well we work as a team. (even as I type this, he’s texting me photos of faucets and fixtures he likes and needs my stamp of artistic approval on).
Lesson: If you give a mouse a cookie, he’s going to ask for a glass of milk to go with it. If you give Ryan a house project, he’s going to give you a coordinating project that needs to get done prior to the completion of the initial project… but it will all be worth it.